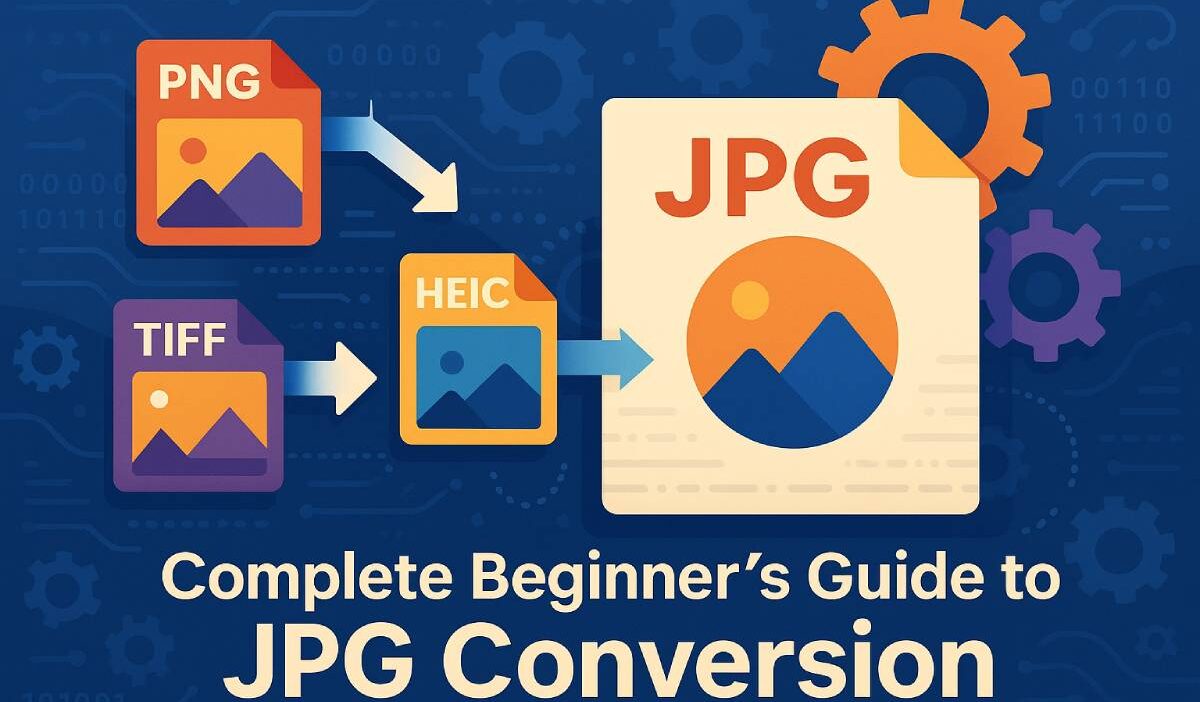
Converting images to JPG is a fundamental skill for beginners aiming to optimize digital content for faster loading and broad compatibility. JPEG’s lossy compression balances acceptable visual quality with significantly smaller file sizes compared to formats like PNG or TIFF, making it ideal for web and mobile use.
Beginners benefit from understanding this process because optimized images directly impact page speed, SEO rankings, and user experience on diverse devices and network conditions.
This guide covers multiple methods—online tools, OS-native apps, desktop editors, CLI utilities, mobile workflows, and automation—so that readers can choose the approach matching their skill level and resources.
We also explain key concepts such as compression levels, metadata handling, transparency flattening, and quality trade-offs to empower readers to make informed decisions when converting images.
What Readers Will Learn
Readers will learn step-by-step instructions for converting various image formats (PNG, GIF, HEIC, TIFF, RAW) to JPG using web-based converters, built-in OS tools (e.g., Microsoft Paint, macOS Preview), desktop applications (GIMP, Photoshop), and command-line tools (ImageMagick, GraphicsMagick). They will understand how to adjust compression/quality settings to strike the right balance between file size and visual fidelity for different contexts (web display vs. light printing).
The guide explains metadata (EXIF) retention vs. stripping for privacy and size considerations, and how to flatten transparency when converting formats that support alpha channels. Additionally, readers will see examples of batch processing and automation for large-scale conversions, mobile-specific approaches (e.g., HEIC-to-JPG on iOS/Android), and integration into web workflows (e.g., CMS plugins, CI/CD pipelines).
Advanced tips cover post-conversion optimization tools (jpegoptim, mozjpeg), responsive image strategies (srcset), and emerging formats (WebP/AVIF) with fallback to JPG for compatibility.
Who Is This Guide For?
- Casual users needing one-off conversions for social media posts or email attachments, seeking simple, no-install workflows.
- Web developers and SEO specialists optimizing site assets for faster load times, better performance scores, and improved user experience.
- Photographers or content creators managing large photo libraries who need to reduce file sizes for sharing or archiving while preserving visual quality.
- IT/DevOps professionals automating media pipelines or server-side workflows, integrating CLI tools (ImageMagick, ExifTool) into scripts and build processes.
Brief Explanation of JPG Format
JPEG stands for Joint Photographic Experts Group, denoting a lossy compression algorithm that reduces file size by discarding non-critical image data.
JPG files are universally supported across browsers, operating systems (Windows, macOS, Linux), mobile platforms (iOS, Android), and social/media platforms—ensuring images display correctly without extra plugins.
Compared to lossless formats (PNG, TIFF) or RAW, JPG typically yields much smaller file sizes, which benefits storage, bandwidth, and loading performance.
However, JPG does not support transparency (alpha channel), so images requiring transparency must be flattened against a background color before conversion.
The adjustable compression level (e.g., quality 75–85) allows users to optimize for either minimal file size or higher visual fidelity depending on use case.
Why Convert to JPG?
Compatibility: JPG’s universal support guarantees that converted images display on all browsers, devices, email clients, and social platforms without compatibility issues.
Performance: Smaller JPG files load faster on websites and mobile apps, improving SEO metrics (e.g., Core Web Vitals) and user satisfaction on bandwidth-constrained networks.
Storage Efficiency: Reducing file sizes saves storage on local devices and servers, lowering hosting costs and simplifying backup/archival processes.
Workflow Simplification: Converting to JPG streamlines sharing and publishing workflows (e.g., email attachments, CMS uploads), and for light printing tasks where lossy compression is acceptable.
Fundamentals of JPEG Conversion
JPEG conversion relies on lossy compression that discards certain image data to achieve smaller file sizes, improving web performance and compatibility while requiring careful management of quality settings, metadata, transparency, and color profiles.
Understanding these fundamentals helps users choose appropriate quality levels (often 75–85 for web) and workflows (flattening transparency, stripping EXIF for privacy, embedding ICC profiles for accuracy) and decide between baseline vs. progressive JPEG based on loading behavior and compatibility. Integration into automation pipelines further streamlines workflows for professionals.
Understanding Lossy Compression
- Lossy compression permanently removes image data deemed less perceptible to human vision in order to reduce file size significantly compared to lossless formats.
- In JPEG, this involves transforming image data via Discrete Cosine Transform (DCT) and quantizing coefficients, discarding higher-frequency details that contribute less to perceived image quality(en.wikipedia.org).
- By contrast, lossless compression (e.g., PNG default) preserves all original data, allowing exact reconstruction but typically yielding larger file sizes.
- The main trade-off is that high compression (lower quality settings) increases visible artifacts such as blockiness or blurring, especially around sharp edges or high-frequency textures.
- For many photographs and web images, moderate lossy compression yields acceptable visual quality while reducing file size by around 10:1 or more, making JPEG ideal for web performance-focused scenarios.
Quality Settings and File Size
- JPEG quality is typically expressed on a scale (0–100 in many tools, or 0–12/0–10 in Photoshop/GIMP), where higher values preserve more detail at the cost of larger file sizes.
- For web images, a quality range of 75–85 often provides a balance between acceptable visual fidelity and reduced file size, improving page load times and SEO metrics.
- Previewing the effect of different quality settings in tools like GIMP or Photoshop (“Show preview” checkbox) helps gauge the point at which artifacts become noticeable for a given image content.
- Highly detailed images (e.g., foliage, textures) may require higher quality (85–90+) to avoid visible artifacts, whereas images with smooth gradients (e.g., skies) can often use slightly lower quality without obvious degradation.
- Excessively low quality (<50) typically yields visible compression artifacts and is suitable only for tiny thumbnails or preview-only images, not for main content.
- Below is a typical illustrative table for web-oriented JPEG quality recommendations:
| Quality Setting | Typical Use Case | Expected File Size Impact |
|---|---|---|
| 85–90 | High-detail web images | Moderate size; minimal artifacts |
| 75–85 | General web images | Good balance: smaller size, acceptable fidelity |
| 60–75 | Smaller previews/thumbnails | Noticeable artifacts in detailed areas |
| <60 | Tiny icons or very small previews | Significant artifacts; only if file size critical |
- Note: Actual file size varies with image dimensions and content complexity; always preview before final export.
- Some tools (e.g., GIMP’s export dialog) show estimated file size when adjusting the quality slider, aiding decision-making.
- For print-critical workflows, keep master files in a lossless format until final steps, and use higher quality JPEG (or avoid JPEG) to maintain detail.
Metadata (EXIF) Handling
- EXIF metadata stores camera settings (aperture, shutter speed, ISO), timestamps, and GPS coordinates when available, providing useful information for photographers and workflows.
- However, embedding EXIF can inflate file size slightly and raise privacy concerns if images shared publicly reveal location or device details.
- Many platforms strip EXIF upon upload (e.g., social networks) for privacy, but retaining certain metadata (e.g., capture date) may be valuable in managed archives or personal catalogs.
- Tools like ExifTool allow stripping all metadata:
exiftool -all= output.jpgto remove EXIF post-export, reducing size marginally and eliminating sensitive tags. - In GIMP or Photoshop export dialogs, users can choose to include or discard metadata selectively (e.g., “Save EXIF data” checkbox) depending on needs.
- For automated batch workflows, integrate metadata stripping after JPEG conversion to ensure privacy and consistent file sizes across libraries.
Transparency and Flattening
- JPEG does not support an alpha channel; images with transparency (e.g., PNG with transparent background) must be flattened against a chosen background color (white or custom) before or during conversion.
- In ImageMagick, a common flatten command is:
magick input.png -background white -flatten -quality 85 output.jpgwhich overlays the image over a white canvas and compresses to JPEG. - Alternatively,
mogrifycan process batches:magick mogrify -format jpg -background white -flatten *.pngto convert all PNGs with transparency in a folder. - In desktop editors (GIMP/Photoshop), add a background layer beneath transparent layers (e.g., fill with white or brand color) then export as JPEG to avoid unexpected artifacts or black backgrounds.
- Failure to flatten properly may result in black or default-color backgrounds or artifacts from underlying layers not intended for final output.
- Always preview flattened result to confirm the background choice complements the subject and avoids distracting edges or halos.
Progressive vs. Baseline JPEG
- Baseline JPEG loads line by line from top to bottom; the image appears only after enough data is downloaded sequentially.
- Progressive JPEG encodes the image in multiple scans; a low-resolution version appears quickly and refines as more data arrives, improving perceived load times on slower connections.
- Progressive JPEGs can be slightly smaller (1–3%) than baseline at equivalent quality levels, saving bandwidth and marginally improving actual load times.
- The perceived faster loading and immediate full-frame preview reduce blank spaces, enhancing user engagement and potentially lowering bounce rates, indirectly benefiting SEO.
- However, encoding progressive JPEGs requires more CPU and memory during export, and some very old browsers may not support progressive rendering fully (though most modern browsers handle them).
- Use progressive JPEG for large, important images (hero banners, feature photos) to improve perceived performance, but test compatibility and encoding resource usage in your workflow.
- In ImageMagick, add
-interlace Planefor progressive:magick input.jpg -interlace Plane -quality 85 output.jpgto create a progressive JPEG. - In Photoshop’s “Save for Web (Legacy)” or export dialogs, select “Progressive” option when exporting JPEG to web.
Color Profiles and ICC
- Color profiles (ICC) ensure consistent color appearance across devices; embedding sRGB profile in JPEG helps browsers and viewers render colors as intended on the web.
- GIMP by default uses sRGB working space and offers options to embed or assign profiles during export; if an image carries a different profile (e.g., Adobe RGB), convert or assign to sRGB for web use to avoid mismatches.
- In Photoshop, include ICC profile on export (“Embed Color Profile: sRGB IEC61966-2.1”) so that supported browsers and image viewers correctly interpret color values, avoiding dull or oversaturated appearance.
- For print-critical work, retain or embed broader-gamut profiles (e.g., Adobe RGB) when preparing images for print, but convert to appropriate profile before final JPEG export to match printing workflows.
- If no profile is embedded, many tools assume sRGB by default, but some browsers or viewers may not color-manage untagged images consistently; explicit embedding is safer for consistent appearance.
- Use GIMP’s “Assign Color Profile” and “Convert to Color Profile” dialogs to manage profiles: assign missing profiles or convert between working and export profiles as needed.
- For automated pipelines, ensure image-processing scripts preserve or embed sRGB profile when generating JPEG for web, avoiding unexpected shifts in color across diverse devices.
Online Conversion Tools
Online conversion tools are ideal for occasional, small-batch image conversions without installing software, offering platform-agnostic access via web browsers, but require careful consideration of file size limits, upload/download times, and privacy when handling sensitive images.
Popular services like Adobe Express, Smallpdf, Online-Convert.com, Canva, FreeConvert, and ImageKit each provide distinct feature sets—supported formats, maximum file sizes, quality adjustments, and privacy assurances—that influence the optimal choice for a given user scenario.
A concise comparison table helps readers quickly identify the best tool for their needs, while step-by-step workflows and tips (e.g., verifying HTTPS, reading privacy policies, deleting sensitive uploads) ensure safe and effective use.
Overview
Online converters allow users to transform images to JPG directly within a browser without installing any software, making them highly convenient for single or few-image conversions on any OS or device.
They are platform-agnostic: whether on Windows, macOS, Linux, or mobile browsers, users simply navigate to the converter URL, upload the file, and download the result. This workflow is ideal when installations are restricted (e.g., corporate machines) or when quick one-off conversions are needed (e.g., social media posts, email attachments).
However, uploading images to third-party servers raises privacy considerations—avoid uploading sensitive or proprietary images unless the service’s privacy policy and security measures (e.g., encryption, automatic deletion) are fully vetted.
Popular Services
Adobe Express PNG to JPG Converter
Adobe Express offers a free online PNG-to-JPG converter accessible via browser, requiring no installation and supporting uploads up to 80 MB on desktop web and 40 MB on mobile apps. It provides automatic compression tuned for web use, with options to adjust quality subtly in some workflows, and ensures images can be downloaded quickly after conversion.
Adobe Express employs TLS encryption and adheres to Adobe’s privacy policy, deleting temporary files after processing per their Terms of Use and Privacy Policy.
Smallpdf Convert Image to JPG
Smallpdf supports free online conversion of PNG, BMP, GIF, WebP, HEIC, and TIFF to JPG without sign-up for basic use, though free users are limited to two document conversions per day; Pro subscription unlocks unlimited conversions, larger file sizes, and batch processing capabilities.
Smallpdf applies TLS encryption during upload/download and automatically deletes files after one hour, enhancing privacy for non-sensitive use cases. The interface guides users through drag-and-drop upload, conversion, and download steps, and offers direct saving to Dropbox or Google Drive for convenience.
Online-Convert.com
Online-Convert.com’s free image-to-JPG converter accepts over 120 source formats and limits uploads to 100 MB per image on the free tier, offering optional settings (quality slider, resizing, filters, DPI adjustments) to fine-tune output. It allows selection between “Best compression” and “Best quality,” plus other effects like cropping or color filters, giving users more control over the final JPG characteristics.
Privacy considerations include using HTTPS and reviewing their policy about file retention; free conversions may be stored briefly but typically deleted after processing.
Canva PNG to JPG Converter
Canva provides a simple PNG-to-JPG converter that compresses files to free up storage and prepare high-quality images for web or social media sharing. Users upload an image, and Canva displays info about accepted formats and privacy practices in their Privacy Policy, ensuring clarity on how content is used and stored.
While Canva’s free converter handles single images, more advanced editing and batch features require a Canva account and possibly a Pro subscription for extensive use.
FreeConvert JPG Converter
FreeConvert allows converting various formats to JPG (and vice versa) with a maximum free upload size of 1 GB, offering advanced settings (resize, keep original size, optional filters) and a commitment to secure uploads via 256-bit SSL encryption with automatic deletion after a few hours.
The service claims high-quality conversions using open-source and custom software, and emphasizes data security in its Terms of Use and Privacy statements.
ImageKit Browser-Based Converter
ImageKit’s online “Convert to JPG” runs entirely in-browser without uploading images to servers, meaning conversions are processed locally for enhanced privacy and no file size or daily limits. This approach removes reliance on internet connectivity for upload/download, speeds up conversion for large files, and mitigates risks associated with third-party storage.
The tool also supports batch conversions with ZIP download and integrates into broader image workflows via APIs and SDKs for automation in web applications.
Other Notable Converters
- Convertio: Offers browser-based conversion with support for many image formats, free tier with file size limits (~100 MB), and Pro plans for larger/batch conversions; uses encryption and auto-deletion policies (similar to others).
- Cloudinary Quick Converters: While Cloudinary primarily serves developers via APIs, they document web-based upload-and-convert flows, highlighting when to use their image transformation API for dynamic JPG conversion.
- Browser-native JS Libraries: Some sites embed JavaScript-based converters (e.g., using Canvas API) to process images locally without uploads, similar to ImageKit.
- Other services: Online tools like Zamzar, ILoveIMG, or EzGIF may support JPG conversion alongside other utilities; compare based on file limits, speed, UI simplicity, and privacy terms.
Steps for Online Conversion
- General Workflow: Navigate to the converter page (e.g., Smallpdf’s “Convert Image to JPG” tool) → Upload or drag-and-drop the source image(s) (PNG, BMP, GIF, WebP, HEIC, TIFF) → Select “JPG” or “JPEG” as output format → Adjust optional settings if available (quality slider, resizing, effects) → Click “Convert” or “Start conversion” → Download the resulting JPG file or save to cloud storage.
- Service-Specific Notes:
- For Adobe Express: Go to Adobe Express image converter, select PNG-to-JPG quick action, adjust minimal settings and download result.
- For Online-Convert.com: After upload, choose quality/compression and optional effects, then start conversion and download the output JPG.
- For ImageKit: Open the browser-based converter, drop files, and let local processing complete without uploads.
- Tips for Secure Use: Always verify the URL uses HTTPS before uploading; read the service’s privacy policy to understand retention/deletion policies; delete any uploaded files via the UI if the service offers an explicit “delete” option, especially for sensitive content.
- Handling Conversion Limits: For free-tier limits (e.g., Smallpdf’s two conversions per day), consider signing up for a trial or using alternative services for additional conversions; for larger batches, look for services with higher free limits (e.g., FreeConvert’s 1 GB) or use local/CLI tools instead.
Pros and Cons
| Aspect | Pros | Cons |
|---|---|---|
| Ease of Use | No installation required; accessible on any device via browser; intuitive drag-and-drop interfaces; minimal learning curve | Dependent on internet connectivity; upload/download times can be slow on poor networks; UI may show ads or prompt sign-up for advanced features |
| Platform Agnostic | Works on Windows/macOS/Linux/mobile without installation; consistent UI across platforms | Browser compatibility issues may arise on outdated browsers; mobile browsers may limit file handling UI (especially for large files) |
| Speed | Quick for single/small images; some services process locally (ImageKit) eliminating upload overhead | For large images or batches, upload/download overhead can become significant; free tiers often cap file sizes (e.g., Online-Convert.com 100 MB, Adobe Express 80 MB) |
| Privacy & Security | Many services use TLS encryption; some auto-delete files after processing; local converters (ImageKit) avoid uploads altogether | Third-party storage poses risk if images are sensitive; need to verify privacy policies; residual copies may persist on server logs temporarily |
| Feature Set | Optional quality adjustment, resizing, filters, metadata stripping in some converters; cloud-save options (Dropbox, Google Drive). | Advanced settings sometimes limited in free version; batch conversion often restricted; deep customization (ICC profile embedding) usually unavailable in web UI |
| Cost | Basic conversions often free; no software purchase or installation needed | Frequent or large-volume use may require paid subscription; free tiers impose limits on conversion count or file size; ads/prompts to upgrade may appear |
Screenshots or GIFs
Including annotated screenshots or short GIFs helps beginners follow the exact steps in a given service’s UI; for example:
- Adobe Express: Show opening the PNG-to-JPG converter, uploading a PNG, clicking “Download” for the JPG result.
- Smallpdf: Demonstrate drag-and-drop into the converter, clicking “Convert” and selecting “Export As Image (.jpg)”, then downloading or saving to cloud storage.
- Online-Convert.com: Illustrate selecting optional settings (quality slider, resize inputs) before starting conversion and downloading the output.
- ImageKit: Capture local processing flow in-browser, indicating no upload progress bar since processing happens client-side.
Operating System Native Methods
Operating system–native methods for converting images to JPG offer quick, no-install solutions that leverage built-in applications on Windows, macOS, and Linux; these methods suit single-image tasks or small batches when users prefer GUI interactions.
On Windows, Paint and the Photos app handle basic conversions with minimal quality controls, while PowerShell combined with ImageMagick enables batch processing in scripts.
On macOS, Preview exports single or multiple images to JPEG with adjustable quality sliders.
Common Linux image viewers/editors (Eye of GNOME, gThumb, Shotwell) support Export/Save As to JPEG, though batch GUI support may vary, prompting use of CLI tools in large-scale scenarios.
Annotated screenshots or examples guide users step-by-step, and tips—such as understanding that “.jpg” versus “.jpeg” extensions are interchangeable—help avoid confusion.
These native approaches streamline occasional conversions, preserving user convenience without extra software installation.
Windows
- Using Paint: Open the image in Microsoft Paint, then navigate to File > Save as > JPEG picture, choose destination and filename, and click Save to export as JPG without additional software.
- Using Photos app: In Windows 10/11, open the image in the Photos app, select the “…” menu or right-click and choose Save as, then select JPEG (or .jpg) as the format; note that quality settings are limited compared to dedicated editors.
- Batch via PowerShell + ImageMagick: For folders with many images, install ImageMagick and use a PowerShell script. For example:
Get-ChildItem -Path "C:\Images" -Filter *.png | ForEach-Object { $dest = $_.FullName.Replace('.png','.jpg') magick $_.FullName -quality 85 $dest }This converts all PNGs in a folder to JPEG at quality 85 via ImageMagick’smagickcommand. Another StackOverflow example shows converting all images in subfolders:Get-ChildItem -Path "C:\Images" -Include *.png,*.bmp -Recurse | ForEach-Object { $out = "$($_.Directory)\$($_.BaseName).jpg" magick $_.FullName -quality 85 $out }ensuring batch workflows without manual GUI steps. - Considerations:
- Ensure ImageMagick is installed and in PATH for
magickcommands to run from PowerShell or CMD. - Backup originals before batch conversion to avoid accidental overwrites.
- Adjust quality parameter based on needs: e.g., 75–85 for web use, higher for archival.
- Ensure ImageMagick is installed and in PATH for
macOS (Preview)
- Single image: Open the image in Preview, then select File > Export, choose Format: JPEG, adjust the quality slider to the desired level (e.g., 75–85 for web), and click Save to export the JPG.
- Batch: In Finder, select multiple images and press Command+O (or right-click > Open With > Preview) to open them all in one Preview window. Then choose File > Export Selected Images, click Options to set Format to JPEG, adjust quality slider and other options (e.g., resolution), then click Choose to save all images as JPGs in the selected folder.
- Considerations:
- Preview supports adjusting image size via Tools > Adjust Size before export for additional file size control.
- For HEIC images, macOS Preview can export to JPEG seamlessly without extra codecs.
- Batch export requires ensuring thumbnails sidebar is visible or selecting in Contact Sheet view to pick multiple images.
- Tips:
- Use descriptive filenames when exporting multiple images to avoid overwriting or confusion.
- Leverage Preview’s built-in export settings to embed or strip metadata if desired, though Preview’s UI may not expose detailed EXIF options (more advanced control via external tools like ExifTool).
Linux GUI
- Common viewers/editors: Many desktop environments include image viewers/editors such as Eye of GNOME (eog), gThumb, and Shotwell that support exporting or saving images as JPEG:
- In Eye of GNOME, open the image, then use File > Save As (or right-click > Save As) and select “JPEG” in the file type dropdown; quality adjustment may not always be available in the UI.
- In gThumb, open the image, choose File > Export As, select JPEG, and adjust quality/size options if presented. Scripts or plugins can automate batch exports in gThumb (e.g., Export Photo Album scripts)(github.com).
- In Shotwell, select photos, then choose File > Export… to open the export dialog where you can set format to JPEG and adjust dimensions/quality settings before exporting.
- If GUI lacks batch: When the GUI does not offer batch export or for large-scale conversions, point users to command-line tools (ImageMagick, GraphicsMagick) covered in the next section for scripting batch jobs.
- Considerations:
- Ensure the needed codecs are installed to open various formats (e.g., HEIC support may require additional libraries).
- Check that the viewer/editor respects embedded color profiles or strips metadata as desired; additional tools may be required for fine control.
- Tips:
- Use file manager bulk selection to open multiple images where supported by the app (e.g., select and drag into gThumb) for quicker workflows.
- When exporting many images, monitor disk space and execution time; consider scripts for automation if export dialogs become cumbersome.
Screenshots/Examples
- Windows Paint annotated screenshot: Show Paint’s menu path: open image → File > Save as > JPEG picture → Save dialog selecting .jpg extension and location. Include alt text: “Microsoft Paint Save As JPEG interface showing format selection.”
- Windows Photos app example: Screenshot of Photos app Save as dialog with JPEG option highlighted. Alt text: “Windows Photos app Save as dialog selecting JPEG format.”
- macOS Preview single export: Annotated image showing File > Export, Format dropdown with JPEG selected, and quality slider. Alt text: “macOS Preview Export dialog selecting JPEG and adjusting quality slider.”
- macOS Preview batch export: Screenshot of Preview sidebar with multiple thumbnails selected, then File > Export Selected Images. Alt text: “macOS Preview batch export dialog for multiple images to JPEG.”
- Linux GUI examples:
- Eye of GNOME Save As dialog selecting JPEG. Alt text: “Eye of GNOME Save As dialog selecting JPEG format.”
- gThumb Export As dialog. Alt text: “gThumb Export As window with JPEG selected and quality slider.”
- Shotwell Export dialog showing JPEG format and size options. Alt text: “Shotwell Export dialog choosing JPEG format and resizing options.”
- Notes for content creators: Host images with descriptive filenames and alt text containing keywords like “Windows Paint convert to JPEG,” “Preview export to JPG,” “Linux gThumb export JPEG” to improve SEO and accessibility.
Tips
- .jpg vs .jpeg extension: Both extensions refer to the same JPEG format; renaming a file extension from
.jpegto.jpg(or vice versa) does not change file content and can suffice when only the extension matters for software compatibility or naming conventions. - Default associations: On Windows, right-click an image and choose “Open with Paint” or Photos to access Save as options quickly; on macOS, ensure Preview is default for image types for streamlined export workflows.
- Quality preview: Native apps may not always show file size estimates; when precise control is needed, use desktop editors (GIMP, Photoshop) or CLI tools to preview resulting JPEG sizes and artifacts.
- File naming: Use descriptive, hyphen-separated filenames (e.g.,
summer-vacation-beach.jpg) to improve SEO when images are used online; avoid spaces or special characters. - Metadata control: Built-in methods typically retain existing EXIF metadata; to strip sensitive data, use tools like ExifTool after export or choose advanced export options in dedicated editors.
- Color consistency: Native methods often assume sRGB for web images; verify color appearance in preview, especially when preparing images for brand-critical use; for print or color-managed workflows, use editors that allow embedding ICC profiles.
- Batch limitations: OS-native GUI batch features may be limited in customization; for large or repetitive tasks requiring specific quality or size settings, consider CLI tools as described in the next section.
- Backup originals: Always keep a copy of the original file before conversion, especially when quality settings are unknown or irreversible via lossy compression.
Desktop Image Editors
Desktop image editors like GIMP, Photoshop, and alternatives (Affinity Photo, Corel PaintShop Pro) offer robust, GUI-based workflows for exporting images to JPEG with fine-grained control over quality, metadata, color profiles, and batch processing.
GIMP’s “Export As” dialog lets users choose quality (0–100), preview approximate file size, and include or strip metadata; transparency is handled by adding a background layer before export, and batch conversion is achievable via the BIMP plugin or scripting.
Photoshop provides single-image exports through File > Export > Export As or File > Save As, and advanced web-optimized export via “Save for Web (Legacy)” with options for progressive JPEG, metadata stripping, and file-size preview; bulk processing is streamlined using the Image Processor script to convert folders of files to JPEG with specified quality, resizing, and color profile settings.
Other editors (Affinity Photo, Corel PaintShop Pro) follow similar “Export” workflows, allowing users to embed ICC profiles, control metadata, and adjust quality; understanding these dialogs ensures consistent results across platforms.
Visual aids (annotated screenshots of export dialogs) improve usability and SEO when published, and best practices include retaining high-quality masters in lossless formats, using macros or actions for repetitive tasks, and naming output files descriptively for SEO benefits.
GIMP
- Open image → File > Export As → choose .jpg → Export dialog: adjust Quality (0–100), select metadata inclusion, preview approximate size. When exporting to JPEG in GIMP, the Export dialog presents a Quality slider from 0 to 100, with values above ~95 rarely beneficial and a default of 85 generally producing excellent results; checking “Show Preview” displays an approximate file-size estimate as quality changes.
- Handling transparency: add background layer before export. Because JPEG does not support alpha channels, users must add a background layer (e.g., white or brand color) beneath transparent content in GIMP’s Layers panel before exporting; failure to flatten properly can lead to unwanted backgrounds or artifacts.
- Batch conversion: using BIMP plugin or scripting (Python). For bulk exports, the BIMP (Batch Image Manipulation Plugin) integrates into GIMP under File > Batch Image Manipulation, enabling batch operations (export to JPEG with chosen quality, rename, resize, apply other GIMP manipulations). Advanced users can script batch exports in GIMP via Python-fu or Script-Fu, iterating over folders and invoking the export procedure for each image(github.com).
Photoshop
- Single export: File > Export > Export As or File > Save As → JPEG → set quality (0–12 or percentage) → Save. In Photoshop, File > Export > Export As opens a dialog where users choose JPEG format, adjust quality (percentage) and image size, preview output, and embed or strip metadata; alternatively, File > Save As allows selecting JPEG with a quality slider (0–12 scale).
- “Save for Web (Legacy)”: advanced settings (progressive, metadata stripping, preview file size). The Save for Web (Legacy) dialog offers granular controls: quality slider with real-time preview of artifacts and file size, options to create progressive JPEGs (
Progressivecheckbox), remove metadata (None, Copyright, All), and adjust image dimensions for web optimization. - Batch: Image Processor script in Photoshop to process folders. Photoshop’s Image Processor (via File > Scripts > Image Processor) automates batch conversion: select source folder, destination, file type (JPEG), quality (0–12), resizing options, and choose to convert color profile to sRGB; it processes all files in the folder and saves JPEGs in a “JPEG” subfolder, preserving originals. Users can extend with Actions: record an Action for export settings, then apply in File > Automate > Batch for custom batch workflows.
5.3 Other Editors
- Affinity Photo: Use File > Export and choose JPEG format; in the Export dialog, select quality slider (0–100), embed ICC profile (e.g., sRGB IEC61966-2.1), and include or omit metadata via “More” panel; color-managed exports ensure consistency across devices. Affinity automatically detects installed ICC profiles and lists them in its Export dialog for precise color control.
- Corel PaintShop Pro: Open image, then File > Save As, choose JPEG from the dropdown, and click Options to open Save Options, where users set quality level, sampling method, progressive vs. baseline if available, and metadata inclusion; resizing before export can be done via Image > Resize to manage file size. Corel’s Digital Workflow guide recommends optimizing JPEG quality based on target platform (web vs. print) and previewing file size impact.
- Other tools: Many commercial and open-source editors (e.g., Affinity Photo, PaintShop Pro) follow similar “Export” or “Save As” patterns with quality sliders, metadata controls, and ICC profile embedding. Always refer to the editor’s documentation for precise steps and best practices.
Visual Aids
- Screenshots of export dialogs in GIMP and Photoshop: Include annotated images showing GIMP’s Export As dialog with Quality slider and “Show Preview” checkbox, and Photoshop’s Export As dialog with format dropdown set to JPEG, quality slider, metadata options, and Preview panel displaying estimated file size.
- Affinity Photo and PaintShop Pro examples: Annotated screenshots of Affinity’s Export dialog showing ICC profile dropdown and metadata checkboxes, and PaintShop Pro’s Save Options dialog with quality and sampling settings.
- Alt text for accessibility and SEO: Use descriptive alt attributes such as “GIMP Export As JPEG dialog with Quality slider at 85 and Show Preview enabled” or “Photoshop Export As JPEG dialog with Progressive option and metadata removal selected” to improve search relevance and assist users relying on screen readers.
Tips
- Use highest appropriate quality for originals; keep master files in lossless format if extensive editing expected. Preserve original images in formats like PSD, XCF, or TIFF until final edits are complete, then export to JPEG for distribution.
- For repetitive tasks, record actions/macros where supported. In Photoshop, record an Action capturing export settings, then apply via Batch or Image Processor script; in GIMP, create a script-fu or Python-fu script or use the BIMP plugin to automate repeated exports.
- Descriptive filenames for SEO: Name exported JPEGs with short, descriptive, hyphen-separated terms reflecting image content (e.g.,
product-sofa-gray-living-room.jpg) to improve search engine understanding and user clarity. - Metadata control: Default exports often retain EXIF; if privacy or size is a concern, explicitly strip metadata via editor options (e.g., Photoshop “Metadata: None” in Save for Web) or external tools (ExifTool) post-export.
- Color profile embedding: For web images, export with sRGB profile embedded to ensure consistent color across devices; for print workflows, export with appropriate ICC profile or convert to target profile before JPEG export.
- Preview file size and artifacts: Use preview features in export dialogs (GIMP “Show Preview,” Photoshop Export As preview pane) to fine-tune quality settings until artifacts are minimally perceptible at intended display size.
- Backup originals: Always keep originals in lossless format in a separate folder or version-controlled repository so that you can re-export with different settings if needed.
- Consistent workflows across team: Document export settings (quality level, metadata policy, color profile) in style guides or documentation so that all team members produce consistent image assets.
- Monitor storage and performance: After exporting, compare file sizes and load times (for web assets) to ensure that JPEG exports meet performance targets; adjust quality or dimensions if necessary(goinflow.com).
Command-Line Tools
Command-line tools such as ImageMagick, GraphicsMagick, ffmpeg, and ExifTool empower users to convert, optimize, and manage images in automated or batch workflows with precision and efficiency.
ImageMagick’s magick and mogrify commands support simple conversions (e.g., PNG to JPG), quality adjustments, transparency flattening, progressive JPEG creation, and batch operations, making it ideal for large-scale or scripted tasks. GraphicsMagick offers similar capabilities via gm convert and gm mogrify with lightweight performance for some use cases.
ffmpeg facilitates extracting video frames as JPEG images, useful in multimedia contexts. ExifTool enables stripping or editing metadata post-conversion to protect privacy and reduce file size.
Integrating these tools into scripts (Bash, PowerShell) and server workflows provides robust automation, while awareness of security policies and resource usage ensures safe deployment in production environments.
ImageMagick
- Installation: Windows installer, Linux via package manager (apt, yum), macOS via Homebrew. Users can download prebuilt binaries or installers for Windows from the official ImageMagick site; on Linux distributions, install via
sudo apt install imagemagickor equivalent package manager commands; on macOS, use Homebrew:brew install imagemagickto obtain the latest version easily. - Simple conversion:
magick input.png output.jpg. Converting a single image from PNG to JPG is as straightforward as runningmagick input.png output.jpgfrom the terminal, leveraging ImageMagick’smagickcommand for format translation. - Quality adjustment:
-quality 85(e.g.,magick input.png -quality 85 output.jpg). To balance file size and visual fidelity, include a-qualityflag (e.g., 75–85 for web images);magick input.png -quality 85 output.jpgproduces a smaller JPEG with acceptable compression artifacts for most online uses. - Flatten transparency:
-background white -flatten. For images with alpha channels (e.g., transparent PNGs), flatten against a background color before converting:magick input.png -background white -flatten -quality 85 output.jpgoverlays the image on a white canvas, avoiding black or unexpected backgrounds in the resulting JPG. - Progressive JPEG:
-interlace Plane. Create progressive JPEGs for improved perceived load speeds by adding-interlace Plane:magick input.jpg -interlace Plane -quality 85 output.jpg, which encodes multiple scans so a low-resolution preview appears early during loading. - Batch conversion:
magick mogrify -format jpg *.pngor with quality:magick mogrify -quality 85 -format jpg *.png. To convert all PNG files in a directory to JPEG in one command, usemagick mogrify -format jpg *.png; to control quality, extend with-quality, e.g.,magick mogrify -quality 85 -format jpg *.pnggenerates JPEG counterparts alongside the originals. - Examples: HEIC to JPG:
magick mogrify -format jpg *.HEIC. If ImageMagick is built with HEIC support, batch-convert HEIC images by runningmagick mogrify -format jpg *.HEIC, though users should verify quality settings as default conversion may degrade quality. - Security policies: When deploying ImageMagick on servers, configure security policies (e.g.,
policy.xml) to restrict potentially dangerous operations and prevent exploits such as processing of untrusted files that may lead to code execution vulnerabilities. - Resource usage: For large batches, monitor CPU and memory consumption since ImageMagick operations can be resource-intensive; consider chunking jobs or using lower-resolution previews to test settings before full-scale runs.
GraphicsMagick
- Usage similar:
gm convert input.png output.jpg, batch withgm mogrify. GraphicsMagick’sgmutility parallels ImageMagick’s commands:gm convert input.png output.jpgfor single-file conversions, andgm mogrify -format jpg *.pngfor batch processing, often with slightly lower overhead in certain environments. - Quality and options: Use
-qualitysimilarly (e.g.,gm convert input.png -quality 85 output.jpg) to adjust compression levels; GraphicsMagick supports many of the same flags but may differ in default behaviors or available filters, so test workflows to ensure parity with ImageMagick outputs. - Flatten and interlace: Flatten transparency and create progressive JPEGs with similar options (
-background white -flatten,-interlace Plane), though syntax may vary slightly; consult GraphicsMagick documentation for precise flag usage when migrating scripts from ImageMagick to GraphicsMagick.
ffmpeg for Frame Extraction
- Extract frames as JPG:
ffmpeg -i input.mp4 frame_%03d.jpgfor video contexts. ffmpeg can decode videos and output individual frames as JPEG images usingffmpeg -i input.mp4 frame_%03d.jpg, where%03denumerates frames; this is useful for generating thumbnails or analyzing video content frame by frame. - Specific frame extraction: To extract a specific frame at a timestamp, use
ffmpeg -ss 00:00:10 -i input.mp4 -frames:v 1 output.jpgto seek to 10 seconds and save one frame as JPG. - Quality control: ffmpeg’s default JPEG encoding uses a pre-set quality; to adjust quality, add
-qscale:v(e.g.,-qscale:v 2for high quality) or use-vf scaleto resize frames before saving, balancing file size and fidelity. - Batch from multiple videos: Scripts can loop over multiple video files to extract frames in bulk, integrating with ImageMagick afterward to further process extracted images if needed.
ExifTool for Metadata
- Strip metadata after conversion:
exiftool -all= output.jpg. ExifTool is a powerful CLI application for reading, writing, and removing metadata from images; to remove all metadata from a JPEG, runexiftool -all= output.jpg, creating a cleaned file without EXIF, IPTC, or XMP tags. - Selective metadata retention: To retain specific tags, use ExifTool’s include/exclude options (e.g.,
exiftool -all= -tagsFromFile @ -DateTimeOriginal output.jpg) to strip unwanted fields while preserving desired metadata. - Integration in scripts: Combine conversion and metadata stripping in a pipeline: for example, after
magick input.png -quality 85 output.jpg, immediately runexiftool -all= output.jpgin Bash or PowerShell scripts to ensure images are optimized and privacy-safe before distribution. - Batch metadata removal: Use wildcards:
exiftool -all= *.jpgremoves metadata from all JPEGs in a directory, useful after batch conversions to standardize files. - Privacy and compliance: Stripping metadata aids in protecting sensitive information (e.g., GPS coordinates) when sharing images publicly or in regulated environments; include ExifTool steps in CI/CD or automated pipelines to enforce metadata policies.
Sample Scripts
- Bash example:
for file in /path/to/images/*.png; do magick "$file" -quality 85 -background white -flatten "${file%.*}.jpg" exiftool -all= "${file%.*}.jpg" doneThis script loops over PNG files, flattens transparency on white background, converts to JPEG at quality 85, and then strips metadata from each output JPG. - PowerShell example:
Get-ChildItem -Path "C:\images" -Filter *.png | ForEach-Object { $dest = $_.FullName.Replace('.png','.jpg') magick $_.FullName -quality 85 -background white -flatten $dest exiftool -all= $dest }This PowerShell snippet processes all PNGs inC:\images, converts to JPEG, flattens transparency, sets quality, and strips metadata.
Tips & Caveats
- Backup originals before batch; test scripts on sample. Always keep original files intact and run scripts on a small subset initially to confirm behavior and avoid irreversible data loss due to lossy compression.
- Monitor performance for large batches; consider resource usage. For large image sets, measure execution time, CPU, and memory usage; consider parallelizing jobs or limiting concurrency to avoid system overload.
- Security: configure ImageMagick security policies to prevent exploits. On shared or public-facing servers, update
policy.xmlto disable unsafe coders or limit resource usage, mitigating risks of malicious uploads or denial-of-service attacks. - Version compatibility: Ensure scripts specify or check ImageMagick/GraphicsMagick versions, as command syntax or available features may differ between major versions (e.g., ImageMagick 6 vs. 7).
- Error handling: Incorporate error checks in scripts (e.g., verify exit codes) and log failures to handle corrupted or unsupported files gracefully in automated pipelines.
- Cross-platform considerations: When sharing scripts between environments, account for path syntax differences (e.g., forward vs. backslashes), and ensure required tools (ImageMagick, ExifTool, ffmpeg) are installed on each target system.
- Documentation and comments: Document script steps, flags used, and expected outcomes in comments to aid future maintenance and onboarding of new team members.
- Combine with version control or CI/CD: Store scripts in version control repositories; integrate in CI/CD to automatically process images on push or deployment events, ensuring consistent output for web assets or multimedia pipelines.
- Privacy compliance: When processing user-uploaded images, implement metadata stripping automatically and comply with privacy regulations (e.g., GDPR) by removing geolocation data before public display.
- Logging and monitoring: Record conversion statistics (file counts, average size reduction) in logs or dashboards to measure optimization effectiveness and guide future quality/size trade-off decisions.
Mobile Conversions
Mobile image conversion workflows are essential for on-the-go users wanting to convert HEIC or other formats to JPG without desktop tools, balancing convenience, quality control, and privacy.
On iOS, setting the camera to “Most Compatible” produces JPG directly, while existing HEIC images can be exported via Photos or synced to macOS Preview for conversion.
Dedicated converter apps (offline vs. online) offer flexibility but require scrutiny of privacy policies.
On Android, built-in share-to-JPG options exist on some versions, and popular apps like Snapseed or Lightroom Mobile enable export to JPEG with quality settings.
Prioritizing offline tools for sensitive images mitigates privacy risks. Including visual guides (annotated screenshots) in documentation enhances usability and SEO by illustrating exact steps.
This section provides detailed, human-like guidance backed by authoritative sources.
iOS (HEIC to JPG)
- Default capture settings: On iOS, navigate to Settings > Camera > Formats and select Most Compatible to capture photos directly in JPG instead of HEIC, ensuring immediate compatibility without post-conversion.
- How this works: “Most Compatible” forces the camera to use JPEG/H.264 for photos/videos, whereas “High Efficiency” uses HEIC/HEVC; changing this avoids HEIC files altogether for future captures.
- Converting existing HEIC: In the Photos app, open the HEIC image, then tap Share > Save to Files or Share via Mail/Message; iOS automatically creates a JPG copy for sharing, or use Export to convert when saving to Files.
- macOS Preview method: Sync HEIC images to a Mac (via iCloud or AirDrop), open them in Preview, then choose File > Export, select JPEG as format, adjust quality slider, and save to convert HEIC to JPG on the desktop side.
- Dedicated converter apps: Apps like “HEIC to JPG – Fast & Easy Image Converter” on the App Store allow offline conversion of HEIC, PNG, WEBP to JPG with batch support; these apps emphasize privacy by processing locally and not uploading images to servers.
- Online vs. offline: Offline apps prevent uploading sensitive images, whereas online converters (e.g., HEIC.online) require internet and may store files temporarily; choose offline tools when privacy is a priority.
- Quality considerations: Many iOS converter apps allow adjusting JPEG quality or resolution before saving, enabling users to balance file size and fidelity depending on use case (social sharing vs. archival).
- Privacy note: Always review app permissions and privacy policies; prefer apps processing locally without sending images to external servers to safeguard sensitive content (e.g., personal photos).
Table: iOS HEIC-to-JPG Conversion Methods
| Method | Requires Internet? | Privacy Level | Quality Control | Batch Support | Ease of Use |
|---|---|---|---|---|---|
| Settings “Most Compatible” | No | High (no conversion) | N/A (direct JPG) | N/A | Simple toggle; applies to new captures |
| Photos Share/Export | No | High (local) | Limited | Single-image | Built-in; automated on share |
| macOS Preview | No | High (local) | Yes (slider) | Multiple via Export Selected | Requires Mac sync |
| Offline Converter App | No (local) | High (local processing) | Yes (varies by app) | Usually Yes | Install app; intuitive UI |
| Online Converter Website | Yes | Medium (uploads) | Yes (web UI) | Varies | Easy but privacy risk; internet needed |
Android
- Built-in share-to-JPG: Some Android versions and manufacturer skins include an option in the Gallery or Photos app to convert HEIC/HEIF images to JPG when sharing; for instance, Samsung Galaxy settings may offer “Convert to JPG” automatically on share.
- Google Photos: Uploading HEIC images to Google Photos can auto-convert them to JPG when downloading on other devices; this provides an indirect conversion path but involves cloud storage(support.google.com).
- Dedicated converter apps: Apps such as “JPEG / PNG Image file converter,” “Image Converter: JPG PNG PDF,” and others on Google Play enable local conversion from HEIC, PNG, WEBP, etc., to JPG, often offering quality and resolution settings.
- Snapseed export: Snapseed allows exporting edited images as JPEG, with a selectable quality percentage; opening an image, applying edits, then tapping Export > Export as JPEG lets users choose output settings, though default export often uses high quality around 90–100% unless changed.
- Lightroom Mobile export: Lightroom Mobile on Android can export images to JPEG via Share To or Export options, allowing choice of resolution, quality, and metadata inclusion; this is preferred for photographers needing controlled output from RAW or HEIC imports.
- Privacy and offline: Many Android converter apps process images locally; verify that apps do not require unnecessary network access. For highly sensitive images, disable internet or use offline-only converters to prevent unintended uploads.
- Quality settings: Android converter apps and exporters like Lightroom let users select JPEG quality (e.g., 70–100), impacting file size; recommend 75–85 for web use and higher for archival or print reference.
- Batch conversions: Some apps support batch processing, letting users select multiple images to convert at once; check app descriptions for batch support to streamline large photo library conversions on mobile.
Privacy and Offline Use
- Offline-first converters: Prefer apps that explicitly state local processing without uploading to servers; review app descriptions and privacy policies for assurances that images remain on-device.
- Avoid unknown web services: When using online converters on mobile, ensure the service uses HTTPS and has a clear privacy policy; avoid uploading extremely sensitive images (e.g., personal documents, confidential photos) to third-party servers without guarantees of deletion.
- Limit app permissions: Only grant converter apps the minimum permissions needed (e.g., access to photos only), and avoid apps requesting unnecessary access (e.g., internet, contacts) to reduce privacy risks.
- Use system share sheets carefully: When sharing via email or messaging to trigger conversion, confirm that the receiving service does not inadvertently upload or store images in formats you did not intend; check default behaviors in Mail or messaging apps.
- Encrypted storage: Store converted JPEGs in encrypted folders or apps if the content remains sensitive after conversion; consider Android’s “Secure Folder” or iOS’s encrypted backups for added protection.
- Automated metadata stripping: Use mobile apps or scripts that strip EXIF data during export to avoid leaking GPS or device information when sharing publicly; for example, Lightroom Mobile export settings can disable metadata inclusion.
Visual Guides
- iOS Settings Screenshot: Include annotated screenshot of Settings > Camera > Formats showing “Most Compatible” selection. Alt text: “iOS Camera Formats settings with Most Compatible selected for JPEG capture.”
- Photos Export Flow: Screenshot of Photos app share sheet showing “Save to Files” or “Mail” options that result in JPG conversion. Alt text: “iOS Photos share menu illustrating export options converting HEIC to JPG.”
- Converter App UI: Annotated images of a popular offline converter app on iOS (e.g., HEIC to JPG converter) showing import screen, quality slider, and save button. Alt text: “HEIC to JPG Converter app interface with quality adjustment slider.”
- Android Gallery Share-to-JPG: Screenshot of Android Gallery’s share dialog with “Convert to JPG” option or indication of Google Photos conversion. Alt text: “Android Gallery share menu showing Convert to JPG option.”
- Snapseed Export: Screenshot of Snapseed export dialog where JPEG quality settings are adjusted. Alt text: “Snapseed export settings with JPEG quality selection.”
- Lightroom Mobile Export: Annotated screenshot of Lightroom Mobile’s export dialog on Android/iOS, displaying resolution and quality options. Alt text: “Lightroom Mobile export dialog selecting JPEG format and quality settings.”
- Privacy Settings: Screenshot example of app permission settings showing storage-only access for converter apps. Alt text: “Mobile app permission settings limiting converter app to photos access only.”
Batch Processing & Automation
Automating image conversions and optimizations is critical for workflows dealing with large volumes of images—such as websites with many user uploads, extensive photo libraries, or legacy archives—because it ensures consistent quality, reduces manual effort, and improves performance and SEO.
Server-side integrations (e.g., WordPress plugins, Node.js Sharp scripts, Python Pillow routines) can automatically generate optimized JPEG thumbnails as soon as images are uploaded, reducing load on teams and preventing unoptimized assets from accumulating.
Incorporating image conversion into CI/CD pipelines guarantees that design assets are optimized before deployment. Scheduled tasks (cron jobs) can process legacy images—e.g., converting old PNGs to JPGs to save storage—while monitoring and logging capture errors and track size reductions and performance gains over time.
A clear workflow—“Upload → Validate → Convert to JPG → Strip Metadata → Store/Serve via CDN”—ensures security, privacy, and performance best practices are followed consistently across environments.
When to Automate
Automation becomes essential when manual conversion is impractical or error-prone in contexts such as websites handling many user uploads, because each upload must be optimized immediately to avoid storage bloat and performance degradation.
Photo libraries containing thousands of images benefit from scheduled or triggered automation to maintain consistent quality and metadata policies without manual intervention.
Scheduled tasks also serve archival maintenance: for example, legacy PNG assets can be converted to JPEG via cron jobs during off-peak hours to reclaim storage and update SEO-relevant image formats automatically. In CI/CD contexts, automating image optimization as part of the build pipeline ensures that every deployed asset meets performance benchmarks before going live.
Finally, automation reduces human error, enforces consistent quality/size parameters, and allows teams to focus on higher-level tasks rather than repetitive conversions.
Server-Side Integrations
- CMS Plugins: WordPress plugins like Smush or ShortPixel automatically optimize images (compress, resize, convert to next-gen formats) on upload, ensuring optimized JPEG thumbnails or WebP fallbacks without manual steps(wordpress.org). These plugins operate in the background or via API calls to offload processing, improving site speed and SEO scores.
- Backend Scripts (Node.js + Sharp): Using Node.js with Sharp, developers can write middleware or upload handlers that intercept user uploads, convert images to JPEG, resize, compress, and strip metadata before saving to storage. For example, an Express.js endpoint using Sharp can:
const sharp = require('sharp'); // inside upload handler: sharp(req.file.buffer) .jpeg({ quality: 85 }) .toFile('/path/to/output.jpg') .then(() => { /* continue processing */ });This ensures on-the-fly conversion and optimization upon upload. - Backend Scripts (Python + Pillow): In Python-based backends (e.g., Django, Flask), Pillow can open uploaded images, convert to RGB if needed, then save as JPEG with specified quality and strip EXIF metadata:
from PIL import Image img = Image.open(uploaded_file) rgb_img = img.convert('RGB') rgb_img.save('output.jpg', 'JPEG', quality=85)Integrating this in upload handling ensures consistency and privacy compliance. - Serverless Functions: On platforms like AWS Lambda or Cloud Functions, image conversion can be triggered on storage events (e.g., S3 upload) to process images without managing servers, converting to JPEG and generating thumbnails automatically.
- CDN Integrations: Some CDNs (e.g., Cloudinary) offer on-the-fly transformations: when an image is requested, the CDN can deliver a JPEG version, resized and compressed per URL parameters, removing need for pre-generation in many cases.
- Security & Privacy: Server-side scripts must validate and sanitize uploads to avoid malicious files. Stripping metadata (ExifTool, Pillow) prevents leaking sensitive data. Ensure tools like ImageMagick or Sharp run in secure, sandboxed environments to prevent exploits.
CI/CD Pipelines
- Integrate Image Optimization Step: Add a build step that processes design assets (e.g., source PNGs) into optimized JPEGs before deployment. For instance, a Node.js script in package.json:
"scripts": { "optimize-images": "node scripts/optimize-images.js" }whereoptimize-images.jsuses Sharp to walk through asset folders, convert images to JPEG with quality settings, resize responsive variants, and output to the build directory. Running this in CI ensures only optimized assets are deployed. - Automated Testing of Optimization: Use tools like Lighthouse CI to verify that image sizes in deployed builds meet performance budgets; if images exceed thresholds, fail the build or warn developers to re-optimize.
- Containerized Workflows: In Docker-based CI/CD, include image optimization tools (ImageMagick, Sharp, Pillow) in the container image so that asset processing is consistent across environments.
- Versioning and Caching: After conversion, generate hashed filenames or use content-based hashes in filenames to leverage CDN caching; integrate this into build scripts to automatically version optimized JPEGs.
Scheduled Tasks
- Cron Jobs for Legacy Archives: Write shell scripts or Python scripts that scan existing image directories for PNG or other formats, check for last-modified dates, and convert files older than a threshold to JPEG with appropriate quality settings to save storage. For example:
#!/bin/bash find /var/www/images -iname '*.png' -mtime +365 -exec mogrify -format jpg {} \;converts PNGs older than one year to JPG. - Scheduled Optimization of New Uploads: If immediate conversion is resource-intensive, queue uploads in a database or message queue and process them in batches via cron at off-peak hours, converting to JPEG, stripping metadata, resizing, and moving to final storage.
- Maintenance Tasks: Schedule jobs to remove orphaned or temporary image files, regenerate thumbnails after template or plugin updates, and run periodic audits to detect unoptimized assets.
- Notification & Alerts: Integrate notifications (email, Slack) when scheduled tasks encounter errors or when metrics (e.g., total storage saved) exceed certain thresholds, keeping teams informed of automation health.
Example Workflows
Below is a representative workflow for automated image handling on a web platform:
| Step | Action | Tool/Component |
|---|---|---|
| Upload | User uploads image via web form or API | Frontend + upload handler |
| Validate | Verify file type, size, and scan for malware | Middleware (Node.js, Python) |
| Convert | Convert to JPEG, resize for thumbnails, apply quality settings | Sharp / Pillow / ImageMagick |
| Strip EXIF | Remove sensitive metadata (e.g., GPS) | ExifTool / Pillow options |
| Optimize | Further compress JPEG (e.g., jpegoptim/mozjpeg) | jpegoptim, mozjpeg |
| Store | Save optimized images to object storage or server filesystem | S3 / local storage |
| CDN Sync | Push or integrate with CDN for caching and delivery | Cloudinary / AWS CloudFront |
| Monitor | Log conversion results: original vs. optimized sizes, errors, processing time | Logging service / DB |
| Serve | Serve images via CDN or server with appropriate caching headers | CDN / web server |
| Audit | Scheduled audit to identify unoptimized or orphaned images and trigger reprocessing if needed | Cron job / CI script |
A flowchart could visualize this:
Upload → Validate → Convert to JPG → Strip Metadata → Optimize → Store → CDN Sync → Serve → Monitor → Audit
This ensures each image passes through consistent steps, maintaining performance, privacy, and SEO benefits.
Monitoring & Logging
- Log Conversion Errors: Capture stdout/stderr of conversion tools (Sharp, Pillow, ImageMagick) in logs; categorize errors (corrupted files, unsupported formats) and alert developers when failure rates exceed thresholds.
- Track Size Reductions: After conversion, record original vs. optimized file sizes in a metrics store or dashboard; use this data to validate that quality settings are effective and inform future adjustments.
- Performance Gains: Correlate image size reductions with site performance metrics (page load times, Core Web Vitals scores) via tools like Google Analytics or Lighthouse CI to demonstrate SEO improvements.
- Resource Usage Monitoring: For batch jobs or serverless functions, monitor CPU/memory usage and execution time to scale resources appropriately or optimize scripts to avoid timeouts and resource exhaustion.
- Dashboards & Alerts: Use observability platforms (e.g., Grafana, Datadog) to visualize ongoing conversion metrics—number of images processed, average size reduction, error counts—and set alerts if anomalies (e.g., sudden spike in errors) occur.
- Audit Logs for Compliance: Maintain logs of metadata stripping actions to demonstrate compliance with privacy regulations; record which images had EXIF removed and when, useful for audits.
- Version Control for Scripts: Track automation scripts in version control, log changes, and note which versions were running when particular conversions occurred, aiding rollback or debugging if format or quality issues arise.
Best Practices for Web and SEO
Web and SEO best practices for JPEG images focus on delivering the right image to the right device at the right time, reducing load times, improving Core Web Vitals, and ensuring accessibility and discoverability. Responsive images via srcset/sizes allow multiple JPEG versions to serve different viewport widths and resolutions, optimizing bandwidth usage(developer.mozilla.org).
Lazy loading offscreen images and serving optimized JPEGs through a CDN improve LCP and CLS metrics by deferring non-critical resources while ensuring critical images load promptly.
Post-conversion tools like jpegoptim and mozjpeg further reduce JPEG sizes with minimal quality loss, benefiting page speed and bandwidth. Progressive JPEGs for large hero images enhance perceived load speed on slow connections by displaying a low-resolution preview first.
Proper cache headers and CDN usage enable efficient delivery and long-term caching of JPEG assets. Accessibility requires meaningful alt text and clear image presentation even when compressed.
SEO practices include descriptive, hyphen-separated filenames and structured data (ImageObject) for critical images to help search engines understand content.
Finally, analytics tracking of image optimization outcomes—page load times, bounce rates, Core Web Vitals—validates the impact of these optimizations and guides continuous improvements.
Responsive Images
Responsive images ensure that browsers download the most appropriate JPEG size for the viewport and device pixel ratio, reducing unnecessary data transfer and improving page speed.
To implement responsive images, generate multiple JPEG versions at different widths (e.g., 320px, 640px, 1024px, 1600px) and reference them in an <img> tag using srcset with width descriptors or pixel-density descriptors plus the sizes attribute to guide browser selection based on viewport conditions.For example:
<img
  src="image-640.jpg"
  srcset="image-320.jpg 320w, image-640.jpg 640w, image-1024.jpg 1024w"
  sizes="(max-width: 600px) 320px, (max-width: 1200px) 640px, 1024px"
  alt="Descriptive alt text">
This pattern lets the browser choose the appropriate JPEG, balancing quality and file size based on screen width. Additionally, consider device pixel ratio (1x, 2x) scenarios by providing higher-resolution JPEGs for retina/high-DPI displays, e.g., [email protected] 2x in srcset for sharper rendering on high-density screens.
Testing in tools like Chrome DevTools’ network throttling and responsive mode verifies that correct images load for different devices and connections, ensuring the responsive setup works as intended.
Lazy Loading & CDN
Lazy loading defers loading of images that are offscreen until they near the viewport, reducing initial page weight and improving Largest Contentful Paint (LCP) for content above the fold.
Implement lazy loading using the loading="lazy" attribute on <img> elements for non-critical images; however, never lazy-load the LCP image (hero/banner), as delaying its load harms LCP metrics(web.dev).
Serve optimized JPEGs via a CDN close to users geographically, enabling faster delivery and caching at edge locations, which reduces latency and bandwidth usage. CDNs often offer on-the-fly image optimization, automatically generating resized or compressed JPEGs per device requests, further streamlining performance.
Combine lazy loading with placeholder techniques (e.g., low-quality image placeholder or blurred placeholder) to provide a smooth user experience as images load. Monitor Core Web Vitals after implementing lazy loading and CDN delivery to confirm improvements in LCP, cumulative layout shift (CLS), and overall page speed.
Compression Tools
After converting or generating JPEGs, apply additional compression tools like jpegoptim or mozjpeg to further reduce file sizes with minimal quality loss. For example, jpegoptim --max=85 image.jpg strips metadata and recompresses the JPEG at quality up to 85, while mozjpeg’s cjpeg can produce more efficient Huffman tables for smaller files:
cjpeg -quality 85 -optimize -progressive input.png > output.jpg
Using these tools in build scripts or CI pipelines ensures all JPEG assets are optimized consistently before deployment. A small table illustrating typical savings:
| Tool | Command Example | Original Size | Optimized Size | Savings (%) |
|---|---|---|---|---|
| jpegoptim | jpegoptim --max=85 image.jpg | 200 KB | 150 KB | 25% |
| mozjpeg | cjpeg -quality 85 -optimize input.png > out.jpg | 200 KB | 140 KB | 30% |
Actual savings vary by image complexity; always review visual fidelity after optimization. Integrate these steps into automation to avoid manual overhead and ensure image sizes remain minimal over time.
Progressive JPEG
Progressive JPEGs encode images in multiple passes, displaying a low-resolution preview immediately which then refines as more data downloads, improving perceived performance—especially on slow connections.
Use progressive JPEG for large hero or feature images that dominate above-the-fold content to reduce perceived load times and enhance user engagement.
Create progressive JPEGs via command-line (e.g., cjpeg -progressive with mozjpeg or magick input.jpg -interlace Plane output.jpg with ImageMagick) or via export dialogs in desktop editors.
Test browser support: most modern browsers support progressive JPEG, but verify that underpowered devices handle progressive decoding without CPU bottlenecks.
Avoid lazy-loading the progressive hero image, but progressive encoding still benefits perceived loading even if the image is large.
Caching and Headers
Set proper HTTP cache headers on JPEG assets to leverage browser and CDN caching, reducing repeated downloads and improving return-visit performance.
Use Cache-Control: max-age=31536000, immutable with unique filenames (e.g., hashed filenames) so assets are cached long-term without revalidation until the filename changes. For assets that may change, use cache-busting strategies (e.g., file fingerprinting) so updated JPEGs load correctly while old versions remain cached by clients until expiration.
Additionally, configure CDNs to honor origin headers or override with optimal caching policies, ensuring JPEGs deliver from edge locations and reducing origin load. Use Content-Type: image/jpeg and appropriate Vary headers if serving different variants (e.g., based on device or quality), though careful configuration is needed to avoid cache fragmentation.
Accessibility
Include meaningful, concise alt text for each JPEG image so assistive technologies convey the purpose and content of images to users with visual impairments.
Follow best practices: keep alt text under ~100 characters, describe the essential content or function (e.g., “Woman using smartphone” rather than “image123.jpg”), and avoid keyword stuffing solely for SEO. Ensure compression does not degrade image clarity to the point of losing critical visual information (e.g., text in images must remain legible after compression).
Provide longer descriptions in surrounding text or via longdesc mechanisms if needed for complex images (e.g., charts) while keeping alt succinct. Use appropriate ARIA roles or captions when images convey essential information beyond decoration.
SEO
- Filename best practices: Use descriptive, hyphen-separated keywords in JPEG filenames (e.g.,
sunset-beach.jpg) so search engines understand image context and can index appropriately. Keep filenames short (around 3–5 words) and avoid underscores or spaces to enhance readability and SEO. - Structured data: Implement
ImageObjectschema in page markup for critical images (e.g., featured images, product photos) to signal searchable content attributes (e.g., caption, author, license) to search engines. For example:{ "@context": "https://schema.org", "@type": "ImageObject", "contentUrl": "https://example.com/images/sunset-beach.jpg", "caption": "Sunset over a tropical beach", "license": "https://creativecommons.org/licenses/by/4.0/" }This markup helps with rich result eligibility and better indexing of image content. - Alt text and surrounding context: Ensure alt text complements page content with relevant keywords naturally, and include descriptive captions or figure legends when beneficial; avoid generic alt like “image”.
- Image sitemaps: For large sites, consider using image sitemaps or including
<image:image>entries in XML sitemaps to surface important images to search engines. - Mobile-first indexing: Since Google indexes mobile versions first, ensure responsive images and lazy loading techniques work properly on mobile, with correct
srcsetandloadingattributes so images are discoverable and indexable. - Page speed: Image optimizations directly impact SEO via page load metrics; monitor and improve LCP by optimizing JPEG delivery as covered above.
Analytics
Track the impact of image optimization on site performance and user behavior by collecting metrics before and after implementing JPEG best practices. Use tools like Google Analytics or custom logging to measure page load times, bounce rates, and engagement changes correlating with image improvements.
Employ performance auditing tools (Lighthouse, WebPageTest) in CI/CD or periodically to assess Core Web Vitals (LCP, CLS) and identify pages needing further optimization. Record image size reductions and bandwidth savings in dashboards to quantify ROI of optimization efforts.
Analyze user engagement metrics (time on page, conversion rates) to determine if faster load times from optimized JPEGs improve overall site goals. Regularly review analytics data and iterate on quality settings or responsive image breakpoints based on observed performance across devices and network conditions.
Troubleshooting Common Issues
Troubleshooting common image conversion issues involves identifying symptoms (e.g., visible artifacts, unexpectedly large file sizes, background artifacts when flattening transparency) and applying targeted solutions such as adjusting quality settings, resizing dimensions, stripping metadata, choosing appropriate background layers, installing necessary codecs for unsupported formats, debugging batch scripts for path or permission errors, ensuring server environments have required tools, and hardening security policies for CLI utilities.
Incorporating clear diagnostic steps and tables to illustrate trade-offs helps users quickly resolve problems and maintain optimized workflows.
Excessive Quality Loss
- Symptoms: Excessive artifacts (blockiness, blur, color banding) often appear when JPEG compression is too aggressive or an image has undergone multiple re-saves (generation loss).
- Cause Analysis: JPEG’s lossy algorithm discards high-frequency detail; re-saving a JPEG repeatedly compounds artifacts (“photocopier effect”).
- Solutions:
- Increase quality setting: Choose a higher quality value (e.g., 85–95 instead of 60–70) in your export or CLI command to preserve more detail.
- Re-export from original source: Always keep a master copy in a lossless format (RAW, TIFF, PNG) and perform compression only once from that original to avoid cumulative degradation.
- Avoid repeated resaves: If minor edits are needed, perform all edits before the final export; do not open-and-save multiple times in JPEG.
- Use preview tools: In GIMP or Photoshop, use “Show Preview” or “Export As” previews to find the minimal quality level where artifacts remain acceptable for your purpose.
- Table: Quality vs. Artifact Risk Quality Setting Artifact Risk Recommended Use 90–100 Very low Archival, print previews 75–89 Low to moderate Web feature images, photography 60–74 Noticeable in detailed areas Thumbnails, small previews <60 High; visible blockiness Only when file size critical.
- Best Practice: Automate checks in batch workflows to flag images where quality <75 for detailed subjects, prompting manual review before publishing.
Large File Size After Conversion
- Symptoms: After conversion to JPEG, files are still unexpectedly large (e.g., hundreds of KB for small-dimension images).
- Possible Causes:
- High resolution: Very large dimensions yield large JPEGs even at moderate quality.
- Metadata retention: EXIF/IPTC/XMP data embedded can add significant bytes, especially with rich metadata (GPS, thumbnails).
- Default compression settings: Some tools default to high quality (90–100), producing large outputs.
- Inefficient encoding: Lack of optimization (no mozjpeg/jpegoptim) can leave redundant Huffman tables and suboptimal compression.
- Solutions:
- Resize dimensions: Scale down images to needed display size (e.g., max width 1024px for web) using CLI or editor before JPEG export.
- Adjust quality: Lower quality to 75–85 for web use, balancing acceptable appearance with smaller size.
- Strip metadata: Remove EXIF/IPTC with ExifTool (
exiftool -all= image.jpg) or via export dialogs to eliminate extra kilobytes. - Post-conversion optimization: Run
jpegoptim --max=85 image.jpgormozjpeg cjpeg -quality 85 -optimizeto further compress without visible loss.
- Table: Impact of Solutions on File Size Action Before Size After Size Savings (%) Original large PNG 1.2 MB N/A N/A Convert to JPEG@90 N/A 800 KB – Resize + JPEG@85 N/A 300 KB ~62.5% Strip metadata 300 KB 260 KB ~13% jpegoptim @85 260 KB 200 KB ~23%.
- Best Practice: Integrate resizing, quality adjustment, metadata stripping, and optimization into automation pipelines to avoid human oversight.
Background Artifacts for Transparent PNGs
- Symptoms: After converting a PNG with transparency to JPEG, unwanted background colors (e.g., black or default) or halos appear around subjects.
- Cause Analysis: JPEG lacks alpha channel; failing to flatten correctly places the transparent image onto a default background (often black) or retains semi-transparent edges resulting in artifacts.
- Solutions:
- Choose appropriate background color: In editors (GIMP/Photoshop), add a new layer beneath the subject filled with white or a brand/color that complements the image before export.
- Use CLI flattening: With ImageMagick:
magick input.png -background white -flatten -quality 85 output.jpgensures consistent white background; adjust-backgroundto other colors if needed. - Mask edges: In complex images with soft edges, apply slight feathering or threshold adjustments before flattening to minimize halos.
- Preview before batch: Test flattening on sample images to confirm background choice works across subjects, preventing widespread artifacts in automated workflows.
- Best Practice: Document the chosen background approach and incorporate into batch scripts; if multiple backgrounds needed (e.g., dark vs. light subjects), include logic to select per image or manually review.
Unsupported Source Formats
- Issues with HEIC, RAW: Attempting to convert HEIC or camera RAW files without necessary codecs leads to errors in tools like ImageMagick or Pillow.
- Solutions:
- Install required codecs/libraries: For HEIC support in ImageMagick, install libheif or OS-specific HEIF libraries before building or via package manager. For RAW formats, use tools like
ufrawordcrawto convert RAW to TIFF/PNG first. - Convert to intermediate format: If direct support lacking, convert HEIC/RAW to PNG or TIFF via dedicated tools (e.g., macOS Preview for HEIC, Adobe DNG Converter for RAW) before JPEG export.
- Use specialized libraries: In scripts, leverage libraries with built-in support: Pillow may require additional plugins for certain RAW types; consider rawpy or imageio for advanced formats.
- Validate format early: In automated pipelines, detect file type via MIME or file signature and branch: if unsupported, route through intermediate conversion; if supported, proceed directly.
- Install required codecs/libraries: For HEIC support in ImageMagick, install libheif or OS-specific HEIF libraries before building or via package manager. For RAW formats, use tools like
- Best Practice: Maintain documentation listing supported formats and required dependencies; include format detection and fallback logic to avoid pipeline failures.
Script Errors in Batch
- Symptoms: Batch scripts fail with errors like “file not found,” “permission denied,” or skip files unexpectedly; special characters or spaces in filenames cause issues.
- Debugging Steps:
- Check file paths: Ensure script uses correct path syntax; quote paths containing spaces or special characters (
"$file"in Bash,"$($_.FullName)"in PowerShell) to avoid splitting issues. - Verify permissions: Confirm the executing user has read/write access to source and destination directories; adjust file permissions or run script with appropriate privileges.
- Test commands manually: Run a single iteration on a sample file in the terminal to confirm the conversion command works before embedding in loops.
- Handle special filenames: Use safe iteration methods (e.g.,
find ... -print0 | xargs -0in Bash) to manage filenames with spaces or Unicode characters. - Log output and errors: Redirect stdout/stderr to log files (
>> script.log 2>&1) to capture error messages for analysis and debugging. - Ensure correct tool paths: If tools (ImageMagick, ExifTool) are not in PATH, reference full paths or update environment variables to locate executables.
- Check file paths: Ensure script uses correct path syntax; quote paths containing spaces or special characters (
- Best Practice: Build scripts with error handling (e.g., check exit codes, continue on errors or abort as appropriate), include verbose logging, and test thoroughly in a staging environment before production use.
10.6 Permission/Environment Issues
- Symptoms: On servers, conversion commands fail with “command not found” or permission errors, or unexpected behavior due to missing dependencies.
- Solutions:
- Ensure tools installed & accessible: Install ImageMagick, ExifTool, ffmpeg, etc., via package managers or binaries; verify versions (
magick -version,exiftool -ver) and that PATH includes their locations. - Set proper file permissions: Ensure the service user (e.g., www-data) has read access to source uploads and write access to output directories; adjust via
chmod/chownas needed. - Isolate environments: Use virtual environments (for Python scripts) or containerization (Docker) to encapsulate dependencies and avoid conflicts with system packages.
- Check available resources: On low-resource servers, conversions may fail due to insufficient memory or CPU; monitor resource usage and consider scaling or queueing jobs to prevent overloading.
- Environment variables: Configure environment variables for temporary directories (e.g., TMPDIR) if default temp paths lack space or permissions, ensuring conversion tools can write intermediate files.
- Ensure tools installed & accessible: Install ImageMagick, ExifTool, ffmpeg, etc., via package managers or binaries; verify versions (
- Best Practice: Document environment requirements (tool versions, dependencies), include health checks in deployment scripts to verify tool availability, and use continuous monitoring to detect environment-related failures early.
Security Concerns
- Vulnerabilities in ImageMagick: ImageMagick has had security issues where processing untrusted images could lead to code execution (ImageTragick exploits).
- Apply security policies: Configure ImageMagick’s
policy.xmlto disable or restrict risky coders/decoders (e.g., PDF, SVG) and limit resource usage (memory, CPU, disk) to mitigate denial-of-service attacks. - Sandboxed execution: Run image processing in isolated environments (containers, chroot) to contain potential exploits and prevent them from affecting the host system.
- Validate inputs: Check file types and sizes before processing; reject suspicious or oversized files to avoid resource exhaustion.
- Keep tools updated: Regularly update ImageMagick, ExifTool, ffmpeg, and related libraries to incorporate security patches; subscribe to security advisories for critical updates.
- Least privilege: Run processing services under restricted user accounts with minimal permissions; avoid running conversion commands as root or with excessive privileges.
- Logging and monitoring: Monitor logs for unusual error patterns (e.g., repeated failures on malicious inputs) and set alerts for suspicious activity during image processing tasks.
- Best Practice: Establish a security review process for image-processing pipelines, periodically audit configuration files (e.g.,
policy.xml), and enforce safe defaults to minimize attack surface.
Advanced Topics
Advanced image workflows extend beyond basic JPEG conversion and optimization, encompassing color management for accurate print reproduction, leveraging emerging formats like WebP and AVIF with JPEG fallbacks for compatibility, and exploring AI-driven optimization tools that can outperform traditional methods.
Metadata strategies balance retention for photography portfolios versus stripping for privacy, often automated in asset pipelines. Image CDNs such as Cloudinary and Imgix dynamically deliver JPEG (or next-gen) images tailored to client capabilities.
Containerized automation (Docker microservices with ImageMagick scripts) streamlines scalable processing, while performance monitoring tools (Lighthouse, WebPageTest) measure the real-world impact of optimization strategies.
Together, these advanced topics enable teams to maintain high-quality imagery, efficient delivery, and SEO performance in complex environments.
Color Management for Print
- Color management ensures that images appear consistently across devices and in print, using ICC profiles to map color spaces accurately from editing to final output.
- In Photoshop or GIMP, working in the appropriate color space (e.g., Adobe RGB or ProPhoto RGB for print) during editing preserves gamut for print-critical projects, then converting or embedding an ICC profile (e.g., “sRGB IEC61966-2.1” for web previews, or a printer-specific profile for final print) on JPEG export ensures accurate reproduction.
- Workflow example: Open or assign the correct source profile (e.g., camera’s Adobe RGB), edit in that space, then use Convert to Profile in GIMP or Edit → Convert to Profile in Photoshop to target the printer’s ICC profile before exporting JPEG with embedded profile.
- Embedding ICC profiles in JPEG adds a small size overhead but is crucial for print workflows; ensure export dialogs in GIMP/Photoshop have “Embed Color Profile” enabled when saving for print purposes.
- For web delivery, convert images to sRGB and embed that profile to maintain consistent display across browsers and devices, avoiding color shifts due to missing or mismatched profiles.
- Test proofs by exporting small test files to the target printer or proofing tool to validate color accuracy before large print runs, adjusting profiles if needed.
Emerging Formats vs. JPG
- Next-gen formats like WebP and AVIF offer superior compression and quality compared to JPEG, reducing file sizes significantly for equivalent perceived fidelity.
- WebP provides smaller sizes than JPEG and supports transparency; AVIF often outperforms WebP, achieving even better compression and HDR/wide-gamut support, though encoding/decoding can be slower depending on tooling.
- Because not all browsers support AVIF or WebP universally, implement a fallback strategy: detect browser capabilities (using
<picture>element or server-side Accept headers) and serve AVIF/WebP where supported, else fall back to optimized JPEG to ensure compatibility. - Example
<picture>markup:<picture> <source srcset="image.avif" type="image/avif"> <source srcset="image.webp" type="image/webp"> <img src="image.jpg" alt="Descriptive alt text"> </picture>This ensures modern browsers load AVIF/WebP, while older ones receive JPEG. - Use server- or CDN-based detection (e.g., Cloudinary’s automatic format selection) to deliver the best format dynamically without complex client-side logic.
- Monitor encoding and decoding performance: AVIF encoding can be resource-intensive; balance build-time costs against runtime savings, possibly generating AVIF/WebP at build-time or on-the-fly via CDNs based on traffic patterns.
- For SEO, include JPEG fallback images in
srcsetor<picture>to ensure search engines index images correctly, and configure sitemaps to reference primary JPEG URLs where needed.
AI-Powered Image Optimization
- AI-driven tools analyze image content to apply context-aware compression, often preserving perceptually important details better than heuristic-based methods, and can upscale or enhance images intelligently.
- Examples include ShortPixel AI, Imagify, and certain Cloudinary or ImageKit features that leverage machine learning to adaptively compress images for different devices and screen sizes.
- AI-based optimization can outperform traditional compression (jpegoptim, mozjpeg) especially on complex images: tests show potential further size reduction (~20–30%) while maintaining visual quality, though results vary by image type and tool implementation.
- Comparison table (illustrative) for a sample image (e.g., 1920×1080 photograph):
| Method | Output Size | Quality Preservation | Processing Time |
|---|---|---|---|
| mozjpeg @85 | 300 KB | Good, some artifacts possible | Fast |
| jpegoptim @85 | 290 KB | Similar to mozjpeg | Fast |
| AI Tool A (ShortPixel) | 220 KB | High fidelity via content-aware compression | Moderate (cloud-based) |
| AI Tool B (Cloudinary ML) | 200 KB | Very good, adaptive per device | On-the-fly (varies) |
- Consider costs and privacy: AI optimization often occurs in cloud services; evaluate if sending images to cloud is acceptable or if on-premise ML solutions exist. Some tools offer on-device or self-hosted ML models for privacy-sensitive contexts.
- Integrate AI tools into CI/CD pipelines: for example, use CLI or API endpoints to process new assets automatically, with fallback to traditional methods if ML service unavailable.
- Monitor results: track size reductions and visual quality via automated tests (e.g., perceptual diff tools) to ensure AI optimization meets standards without introducing artifacts or undesirable alterations.
Metadata Use Cases
- EXIF and other metadata can be valuable for photographers’ portfolios, preserving capture details (camera model, settings, location) that aid organization, searchability, and authenticity verification.
- For public-facing images where privacy is a concern (e.g., travel photos with GPS data), stripping metadata prevents unintended disclosure; automated pipelines often remove EXIF on upload while retaining in private archives.
- Automated metadata management workflows use tools like ExifTool or libraries (Pillow, metadata-extractor) to read, write, or strip tags based on rules: e.g., retain DateTimeOriginal but remove GPS fields for web uploads.
- Table: Metadata retention strategies
| Use Case | Retain Metadata? | Fields to Keep | Fields to Strip | Tool/Method |
|---|---|---|---|---|
| Personal archive | Yes | All EXIF (DateTime, Camera settings) | None | Preserve in RAW/TIFF |
| Portfolio display | Partial | DateTime, Camera model | GPS, Owner info | ExifTool scripting |
| E-commerce thumbnails | No | None | All EXIF & IPTC | Strip via ExifTool or Pillow |
| News/media publishing | Yes/Partial | DateTime, Author, Copyright | GPS if sensitive | Automated pipeline rules |
- Embedding descriptive metadata (copyright, creator, usage rights) can improve SEO and legal clarity when images are republished or indexed; use IPTC/XMP fields appropriately before exporting JPEGs for distribution.
- Implement metadata handling in batch or server-side scripts: e.g., upon upload, parse EXIF, decide retention or removal, then embed necessary XMP tags (e.g., copyright notice) before saving optimized JPEG to storage.
- Maintain a record (logs or database) of metadata transformations for auditing and compliance, indicating which images had metadata stripped or modified and why.
Integration with Image CDNs
- Image CDNs such as Cloudinary and Imgix offer dynamic URL-based transformations to convert images to JPEG (or next-gen formats) on-the-fly based on client capabilities, eliminating the need to pre-generate every variation.
- With Cloudinary, you can request a URL like
https://res.cloudinary.com/demo/image/upload/f_auto,q_auto/sample.jpg, wheref_autochooses format (WebP/AVIF/JPEG) based on browser, andq_autopicks optimal quality, ensuring efficient delivery. - Imgix similarly uses query parameters (
?fm=auto&auto=compress,format) to detect device support and serve appropriate JPEG or WebP variants, optimizing for bandwidth and performance. - This approach simplifies responsive and fallback logic: front-end can reference a single dynamic URL, and the CDN handles format choice, resizing, cropping, and optimization per request, improving caching and reducing development complexity.
- Monitor CDN analytics to understand format delivery stats (percentage of users receiving WebP vs. JPEG), and adjust fallback strategies or caching rules accordingly to maximize performance benefits.
- For SEO, ensure that canonical image URLs point to the primary JPEG or are correctly referenced in sitemaps and structured data, even if actual delivery uses dynamic URLs behind the scenes.
Automation with Containerization
- Containerization enables encapsulating image conversion microservices (e.g., Docker containers running ImageMagick or custom scripts) for scalable, reproducible deployment across environments.
- Example Dockerfile snippet for an ImageMagick-based microservice:
FROM alpine:latest RUN apk add --no-cache imagemagick bash COPY convert.sh /usr/local/bin/convert.sh RUN chmod +x /usr/local/bin/convert.sh ENTRYPOINT ["convert.sh"]Here,convert.shcould accept input path and output path arguments, usingmagickcommands to process images inside the container. - In Kubernetes or Docker Compose setups, scale multiple instances of the conversion service behind a queue (e.g., RabbitMQ, AWS SQS) so uploaded images are processed asynchronously and containers can scale based on load.
- For Node.js or Python-based image processing microservices, build container images including dependencies (Sharp, Pillow) and mount volumes or connect to object storage (S3) for input/output, ensuring environment consistency across dev, staging, and production.
- Container health checks can verify that required tools (ImageMagick, ExifTool) are present and functioning; include automated tests in CI to build and test the container before deployment.
- Use multi-stage builds to include only necessary binaries in final image, reducing size and attack surface; for example, compile ImageMagick in a builder stage, then copy binaries into minimal runtime image.
Performance Monitoring
- Regularly audit image optimization impact using tools like Lighthouse and WebPageTest, which flag unoptimized images and measure Core Web Vitals affected by images (LCP, CLS).
- Set up automated performance tests in CI/CD (e.g., Lighthouse CI) to catch regressions: after each deployment, run audits that check for newly added images exceeding size budgets or lacking responsive attributes, failing builds or alerting teams.
- Use analytics dashboards to correlate image size reductions with real user metrics (e.g., Real User Monitoring data showing improved load times, lower bounce rates on pages after optimization).
- Track metrics such as average image size per page, total bytes served, and edge cache hit ratios in CDN analytics to measure efficiency gains over time.
- Employ synthetic monitoring tools (e.g., WebPageTest scripts) to periodically test key pages under different network conditions and locations, observing how optimized JPEG and next-gen formats perform across geographies.
- For AI-optimized or CDN-delivered images, include monitoring of service health and response times; ensure fallback paths (e.g., JPEG fallback when CDN ML optimization fails) to maintain reliability.
- Document and share optimization reports with stakeholders (designers, developers, marketing) to demonstrate ROI of image workflows, guiding future investments in tooling or infrastructure.
FAQs
Will renaming .jpeg to .jpg suffice?
Yes. The .jpeg and .jpg extensions denote the same JPEG image format, so simply renaming the file extension does not alter the file content or format and is sufficient when the file is already a valid JPEG.
This practice can help maintain consistent naming conventions or resolve compatibility quirks in software that expects a specific extension.
However, renaming does not convert non-JPEG files; ensure the file is truly a JPEG before changing the extension to avoid confusion.
How to convert multiple images at once?
- macOS Preview batch export: In Finder, select multiple images (hold Command or Shift), open them in Preview, then use File > Export Selected Images, choose JPEG and adjust quality/size options before exporting all at once.
- CLI with ImageMagick: On any OS with ImageMagick installed, run:
magick mogrify -format jpg *.png(or add-quality 85for compression control) to batch-convert all PNGs in a directory to JPEG. This overwrites or creates new.jpgfiles alongside originals based on usage ofmogrifyor custom scripts. - Batch GUI tools: Applications like XnConvert allow selecting folders of images (PNG, TIFF, HEIC, etc.) and configuring batch conversion to JPG with quality, resizing, and metadata options via a graphical interface. This suits users preferring GUI workflows without scripting.
- Considerations: Always backup originals before batch operations to prevent irreversible changes. Test on a small subset first to confirm settings and naming conventions.
How to maintain transparency when converting PNG to JPG?
JPEG does not support transparency (alpha channels); you must flatten transparent images against a chosen background color to avoid unwanted artifacts. In desktop editors (e.g., Photoshop or GIMP), add a background layer (white or brand color) beneath the transparent content before exporting as JPEG. In ImageMagick CLI, use:
magick input.png -background white -flatten -quality 85 output.jpg
to overlay the image on a white background and convert to JPEG, preventing black or unexpected backgrounds. Always preview flattened results to ensure background choice complements the subject and avoids halos; adjust background color or apply edge feathering as needed.
What is the optimal quality setting?
For web usage, a JPEG quality range of 75–85 often balances file size reduction and acceptable visual fidelity, reducing load times and improving SEO metrics.
At 80% quality, most photographs exhibit negligible visible degradation while achieving significant size savings. For print or archival purposes, use higher quality (90–95) or maintain a lossless master format (e.g., TIFF) until final JPEG export to avoid artifacts.
Use preview features in editors (GIMP’s “Show Preview,” Photoshop’s “Export As” preview pane) to test various quality levels on representative images before batch export. Quality below ~75 can introduce noticeable artifacts in detailed images and is typically reserved for tiny thumbnails or extreme size constraints.
How to strip EXIF metadata?
Use ExifTool to remove metadata from JPEGs via:
exiftool -all= output.jpg
which strips all EXIF, IPTC, and XMP metadata except essential color information blocks, reducing file size slightly and eliminating privacy-sensitive data (e.g., GPS). In desktop editors (e.g., Photoshop Save for Web), choose “Metadata: None” to remove metadata during export. For batch operations:
exiftool -all= *.jpg
removes metadata from all JPEGs in a directory. To retain specific tags (e.g., DateTimeOriginal), use ExifTool include/exclude options (-tagsFromFile @ -DateTimeOriginal output.jpg) to strip unwanted fields selectively. Automate metadata stripping in pipelines to enforce privacy and size standards.
Can I convert HEIC to JPG on Windows?
Yes. On Windows 10/11, install the HEIF Image Extensions from Microsoft Store to enable native HEIC support in apps like Photos, then open a HEIC image in the Photos app and choose Save as > JPEG to convert. Alternatively, use ImageMagick built with HEIC support:
magick mogrify -format jpg *.HEIC
to batch-convert HEIC files to JPEG, though note potential quality loss and verify settings. Dedicated offline converter apps or online services can also convert HEIC to JPG on Windows; prefer offline tools for privacy-sensitive images.
Should I use progressive JPEG?
Progressive JPEGs encode images in multiple scans, displaying a low-resolution preview quickly which then refines, improving perceived load speed—especially beneficial for large hero or feature images on slower connections.
Most modern browsers support progressive JPEG, though some render them like baseline; test critical user-agent coverage before broad adoption.
Create progressive JPEG via CLI (magick input.jpg -interlace Plane output.jpg) or in export dialogs (Photoshop “Progressive” option) to leverage perceived performance gains without degrading SEO.
Do not lazy-load the main above-the-fold image, but use progressive encoding for prominent images to reduce bounce rates and improve Core Web Vitals by enhancing perceived load times.
How to automate conversions on my website?
Use backend scripts to intercept uploads and convert images to JPEG automatically. For Node.js, the Sharp library offers high-performance conversion:
const sharp = require('sharp');
sharp(req.file.buffer)
  .jpeg({ quality: 85 })
  .toFile('/path/to/output.jpg')
  .then(() => { /* continue */ });
ensuring on-the-fly optimization upon upload. In Python backends (Django/Flask), use Pillow:
from PIL import Image
img = Image.open(uploaded_file).convert('RGB')
img.save('output.jpg', 'JPEG', quality=85)
to automate conversion and compression. For WordPress, plugins like Smush or ShortPixel auto-generate optimized JPEG thumbnails on upload, integrating with CDN workflows. Integrate these scripts into CI/CD pipelines or serverless functions (e.g., AWS Lambda triggered on S3 uploads) for scalable, automated JPEG conversion and optimization.
What about new formats like WebP?
WebP and AVIF provide superior compression over JPEG, reducing file sizes significantly while maintaining visual quality; however, ensure browser compatibility by implementing fallback strategies using the <picture> element or server-side detection. For example:
<picture>
  <source srcset="image.avif" type="image/avif">
  <source srcset="image.webp" type="image/webp">
  <img src="image.jpg" alt="Descriptive alt text">
</picture>
serves AVIF/WebP when supported and JPEG otherwise. MDN recommends including fallbacks for formats with broader support to ensure all users see images correctly. Automate generation of WebP/AVIF variants alongside JPEG in build pipelines or via CDNs (e.g., Cloudinary’s f_auto) to deliver optimal formats per client.
How to handle color profiles?
For web images, convert and embed the sRGB ICC profile during JPEG export to ensure consistent color across browsers and devices; missing or mismatched profiles can lead to color shifts.
In Photoshop, select “Embed Color Profile: sRGB IEC61966-2.1” in export dialogs; in GIMP, convert images to sRGB and enable profile embedding in the Export As dialog. For print-critical work, edit in a wider-gamut space (e.g., Adobe RGB) then convert to a printer-specific ICC profile before exporting JPEG to match printing workflows accurately.
Always preview exported images in representative environments or proofing tools to validate color fidelity before publication or printing.